If you found value in this post, consider following me on X @davidpuplava for more valuable information about Game Dev, OrchardCore, C#/.NET and other topics.
Overview
You can find countless resources online about how to get started in a particular programming language. This post introduces to you to the concept of programming in general using the C# programming language. You will learn basic terminology and actions related to programming and executing a very simple application.
Target Audience
If you have little or no experience programming, you may benefit from the information below. If you are an experienced programmer or a professional programmer, this information might not be very helpful.
This article uses the C# programming language.
Programming in C# is well documented by Microsoft at https://dotnet.microsoft.com. It is easy to become overwhelmed by all the information on the documentation if you have no prior programming experience. If you've tried to get started programming in C# and found it difficult, this article is for you.
Hopefully working through this article leaves you with a satisfying desire to learn more about programming.
Windows or macOS?
You can use either Windows or macOS. C# is a programming language for Microsoft's .NET platform which has been around since about 2001. There is a lot of history and transformation with the .NET. You will work specifically with .NET Core 5.0 which is compatible with both Windows and macOS.
No Programming Experience
You do not need any prior programming experience. Where appropriate, you will learn basic programming concepts such as syntax, compiling, and running the application. You will start by installing tools and finish with a complete application.
Then what?
After you complete this tutorial, your goal should be to practice programming as much as possible. You will find the most success by adding small, incremental changes to your existing application. If you attempt to do something that is too complex, you may become frustrated and give up because "programming is too hard".
Programming is hard. But all hard things can be broken down into easier chunks that you can master separately. Then you will gradually increase your competency in programming. Practice makes perfect. This is the same reason why a lot of online games have the concept of leveling up. Likewise, you need to level up your programming skill to become a master programmer.
Let's Get Started
Before you master the art of programming, you first need to understand the basic form and actions that go along with it.
Generally speaking, programming which is also referred to as "writing software" is your way of telling a computer to do something you want it to do. To do so, you must communicate with the computer to give it instructions you want it to follow. In practice, the most common way you do this as a programmer is through writing those instructions down for the computer to read and then execute.
Your first action then is to write down lines of instructions, called code statements, into a file. These code statements are the step by step actions for the computer to take to achieve some outcome you desire.
Your next action is to run or execute a special program called a compiler that reads your code statement file and produces a new file. This newly produced file is an executable application file that you can run.
Let's break that down.
Code Statements
Code statements are short, written pieces of text that represent instructions a computer will execute as it operates. A trite example is
Display on screen, "Hello World".
You can write multiple code statements, one after another such as
Display on screen, "Hello World".
Display on screen, "Enter your name:".
and the computer will process the statements in order, left to right, top to bottom. The above example could very well be written as
Display on screen, "Hello World".
Display on screen, "Enter your name:".
which is closer to how statements in programming are written, often with one instruction per line.
If you are familiar with the rules of the English written language, you know a period character (.) separates statements in English, as in the example above. You also know there are others rules in English that change the meaning of these statements depending on the context in which they are written.
These statements and rules have a specific meaning in the realm of the English language, and may be nonsensical in a different language with its own language rules.
This concept of meaning derived from statements in the context of the rules of a language is as true in the world of programming languages as it is languages of the written word.
Programming Languages
The world is full of different written languages, such as English, Spanish, or Latin. Similarly, the world of programming is full of different languages such as C#, Java, or php.
Each of these languages has its own set of rules. Some rules will be the same or similar across languages; some rules will be very different. Some rules will exist in one language but not another.
As you learn how to program, you will do so in the context of a specific programming language. You will learn about the specific rules of that programming language and how to use those rules to get a computer to do what you want.
When you become proficient in one programming language, it helps you to master other programming languages more quickly. For example, even though the rule for ending a statement may differ between languages, you still know that a rule must exist for ending a statement. In a written language these rules are called grammar, and in a programming language these rules are called syntax.
Syntax
Reviewing the English language statements above, you have
Display on screen, "Hello World".
Display on screen, "Enter your name:".
The English language syntax (if you will) says that a period (.) character determines the end of the statement. It also says that the phrase "Display on screen" has a specific meaning, which you can take to literally mean to show something on the computer screen. You also see the comma (,) character that separates the statement into two phrases. The first phrase "Display on screen" is an action. The second phrase is a string of text surrounded by double quote (") characters to indicate that piece of text to display.
Knowing some rules of English grammar can help you learn the syntax of a new language, a programming language.
Consider the C# programming language. If you learn that the rule for ending a statement is the semicolon (;) character rather than a period (.) character, you could rewrite the above statements as follows
Display on screen, "Hello World";
Display on screen, "Enter your name:";
If you also learn C#'s syntax rule for displaying something on the screen is Console.WriteLine rather than Display on Screen, then you can further revise your statements to get
Console.WriteLine, "Hello World";
Console.WriteLine, "Enter your name:";
Lastly, if you also understand C#'s syntax rule for displaying text with Console.WriteLine is to surround the text with double quote (") characters and parenthesis (() ()) characters, then you can rewrite the statements as follows
Console.WriteLine("Hello World");
Console.WriteLine("Enter your name:");
You now have syntactically correct C# statements which mean the same thing as its English statement counterparts.
The English language statements
Display on screen, "Hello World".
Display on screen, "Enter your name:".
translates to the C# language statements
Console.WriteLine("Hello World");
Console.WriteLine("Enter your name:");
Learning a new programming language is very similar to learning a new spoken or written language. Once you understand the rules of the language you are able to communicate with someone else; in this case, that someone else is a computer. Like any non-native speaker or writer of the language, the more you practice, the better you can communicate with the other person, even if they're a computer.
From Statements to Software
It would be great if you only needed to write statements and the computer would automatically understand their meaning and your intent. Unfortunately, this is not the case and you need to take more actions before a computer starts doing what you want.
Before a computer can execute your statements, you must first transform those statements into an executable program the computer can run. Computers do not natively speak any of the programming languages you will learn throughout your career. They speak a very specific set of instructions designed for their central processing unit (CPU) architecture. Your programming language statements must first be transformed into this instruction set language. This action of transforming your statements into instruction set statements is called compiling or building.
Compilation
Set aside for a moment the concept of interpreted languages which is a topic for another article. If your programming language is a compiled language, that means that the code statements must be transformed, or compiled into something a computer can understand before it is executed. To do this, you save your code statements to a file. You then run a program called a compiler giving it the file name of your code statement file as input. The compiler then outputs a new, different file that is your executable program. This outputted file is your software application that you can then execute, and the computer will do what you want.
Your programming language, in addition to the rules that comprise that language, provides you the compiler program as a tool. The language may also provide a set of tools, or applications, that you can use for various purpose when programming in that language. This set of tools is called a Software Development Kit (SDK).
For example, continuing with the trite hello world example, you have two C# code statements. The C# programming language comes with a compiler tool as part of the Microsoft .NET Software Development Kit (SDK). You must first install the compiler tool by downloading and installing the SDK from here:
https://dotnet.microsoft.com/download
You want to install the Software Development Kit (SDK) for .NET Core. Install the latest version which as of this writing is .NET Core 5.0. You must first select the operating system you are using. If you are using Windows, select the Windows installer for .NET Core 5.0, if you're on macOS, select the macOS installer, etc.
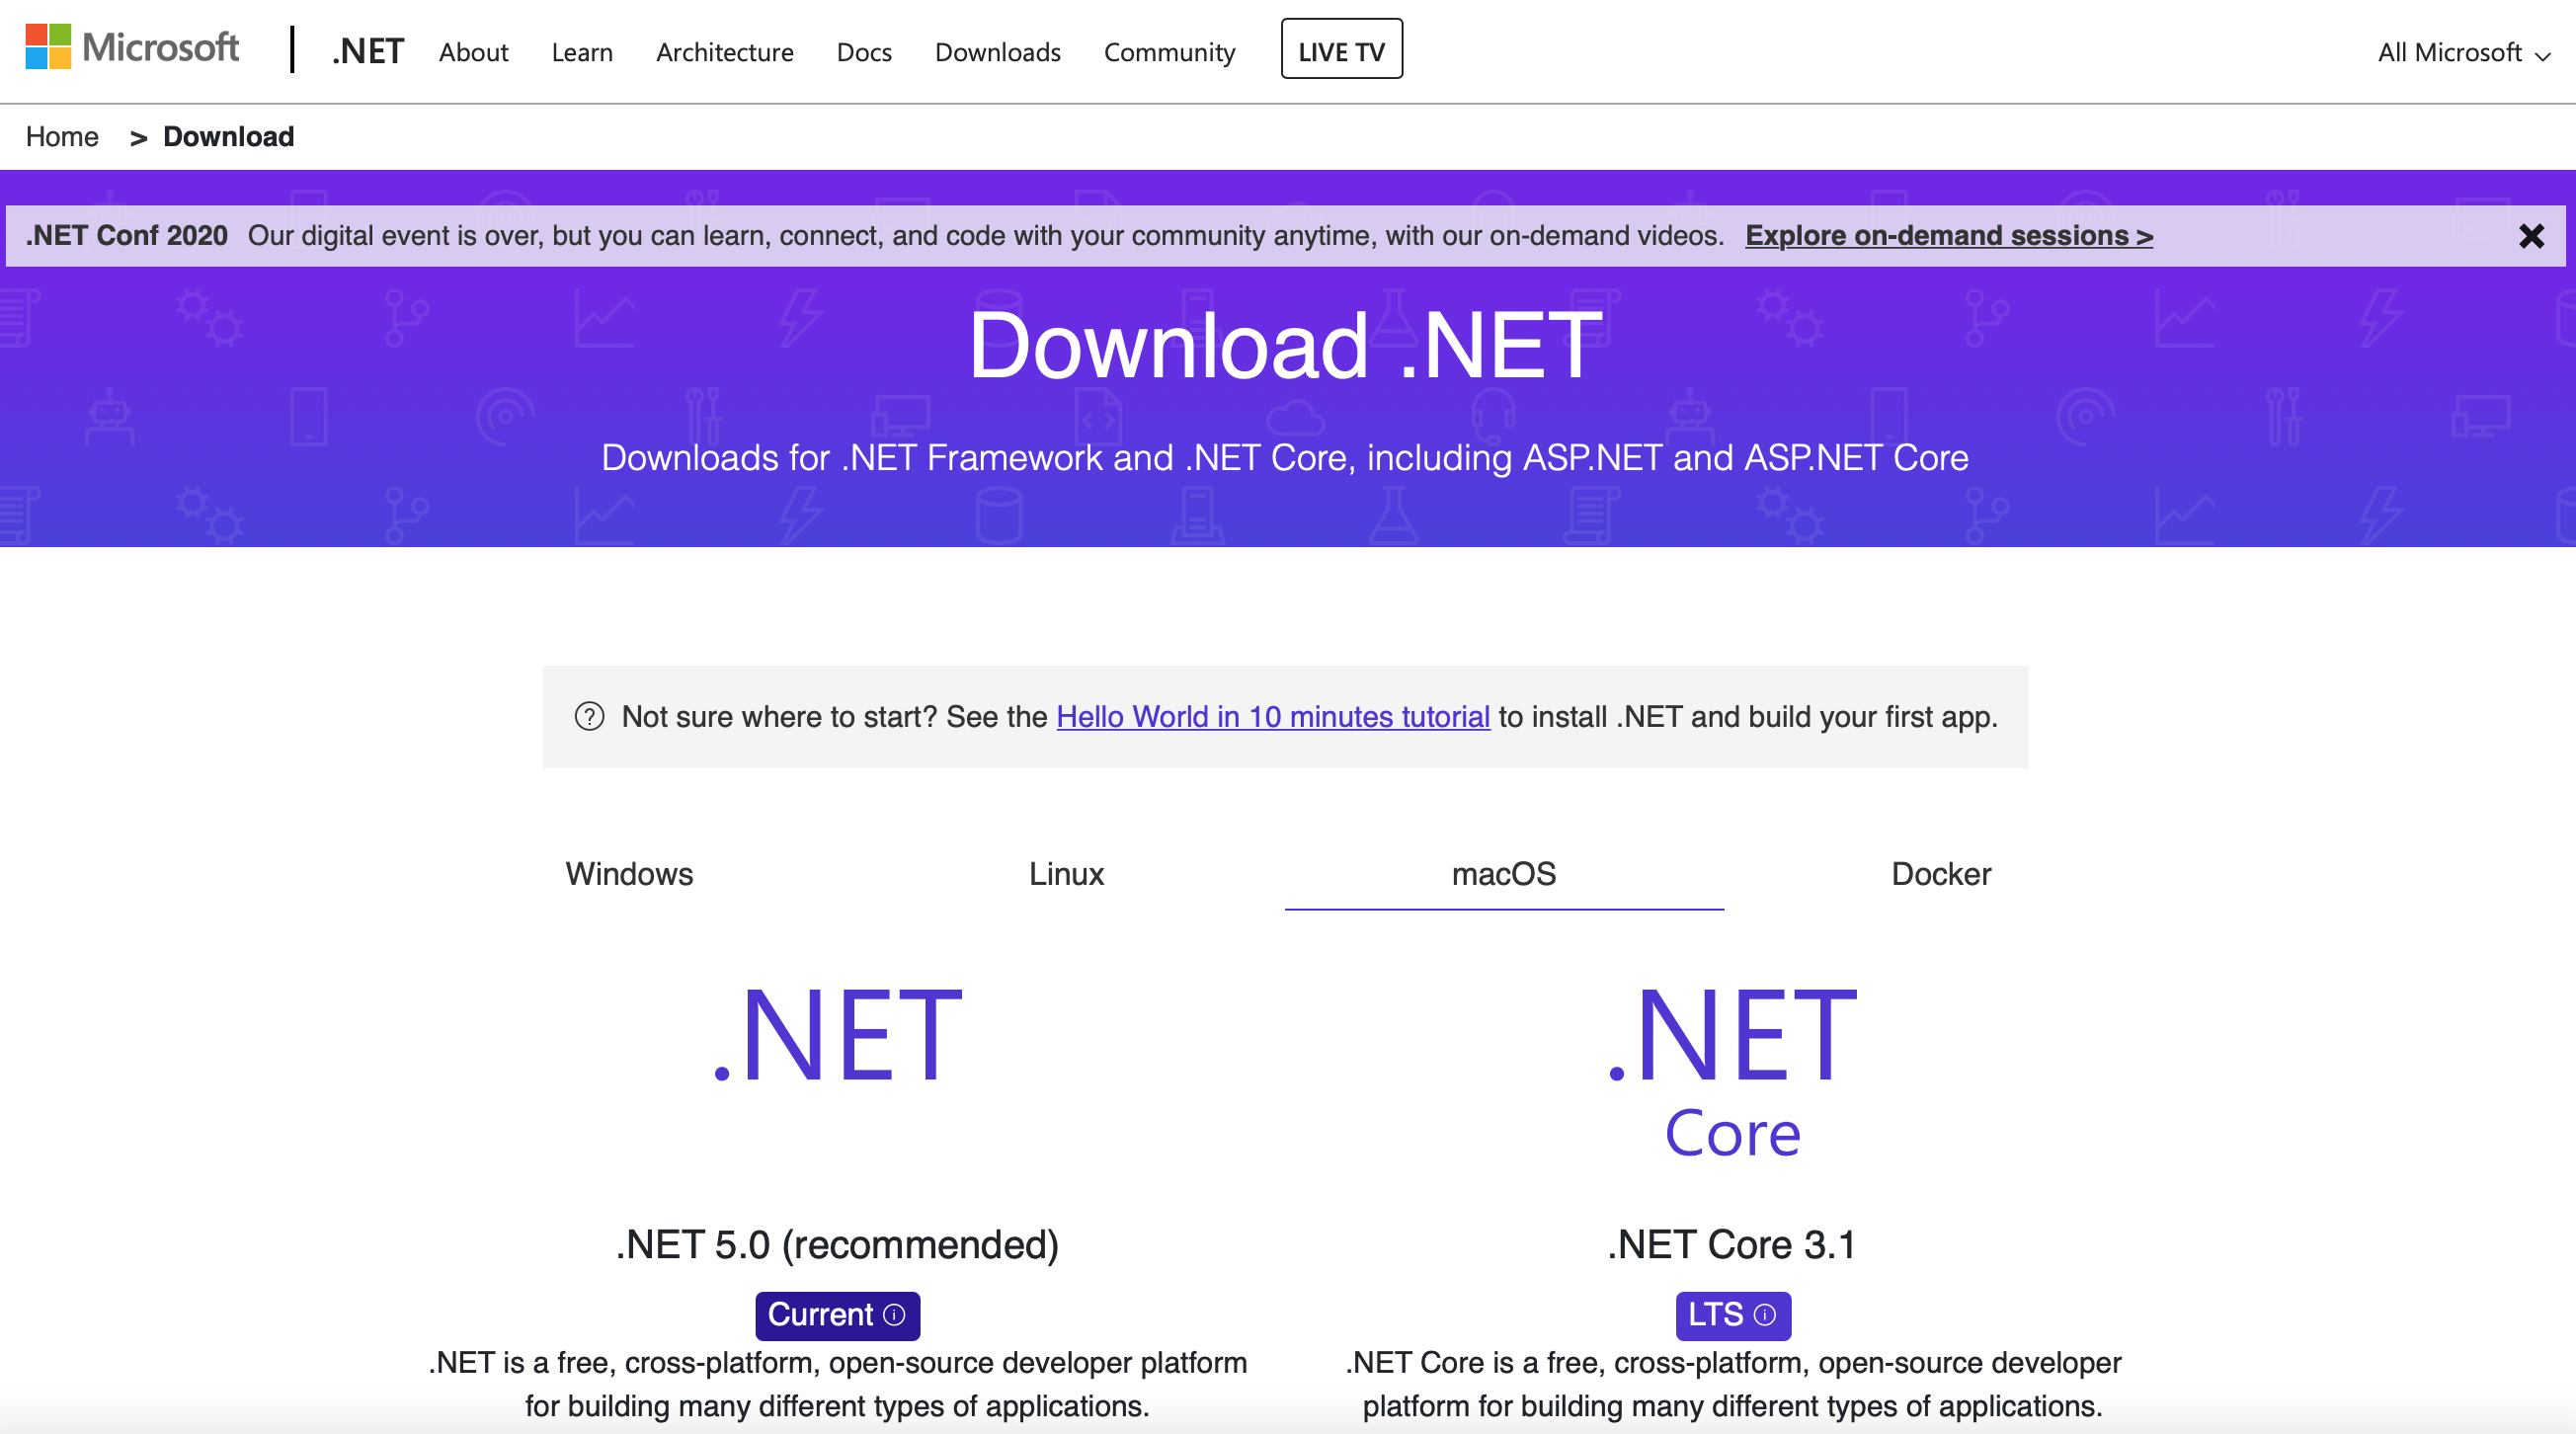
Click the "Download .NET Core SDK" button to download the installer file. Run the installer file for you platform and follow the onscreen installation instructions. You can accept all the default values.
What is happening is you are installing the Software Development Kit (SDK). An SDK is a collection of programs and files that you use directly and indirectly to program in a programming language. The installer is copying these files to your computer so you can use them for developing software. The C# programming language is part of the ".NET Platform" from Microsoft which is why you're installing the .NET Core SDK. A small point to mention, is that .NET Framework and .NET Core are different but related. This difference is not important for this article, but generally speaking .NET Core is a new addition to the .NET Platform that, among other things, allows you to write software to run on Windows, Linux and macOS.
When you finish installing the .NET Core SDK, run the following to see what was installed.
Running Commands
If you are already familiar with running programs and commands on the command line or terminal, go ahead a skip to the next section. If you don't know what that means or are unsure, please read this section.
You may be accustomed to using the graphical user interface (GUI) of your computer. The mouse, pointer, icons, windows, clicking and double-clicking. Using a computer this way is perfectly normal and there are tools that allow you to program using similar GUI experience. Still though, it is important for you to know about the command line, text based tools when learning how to program.
Knowing about, understanding and using the command line is an important skill to learn as a programmer. Software is more that just fancy graphics. It is also a combination of logic and data. Fancy graphics is an advanced kind of programming that can frustrate you as a beginner programmer. A text based or command line interface (CLI) is easier to begin your programming education which is why so many learning materials will start with it. You will start with CLI programming here.
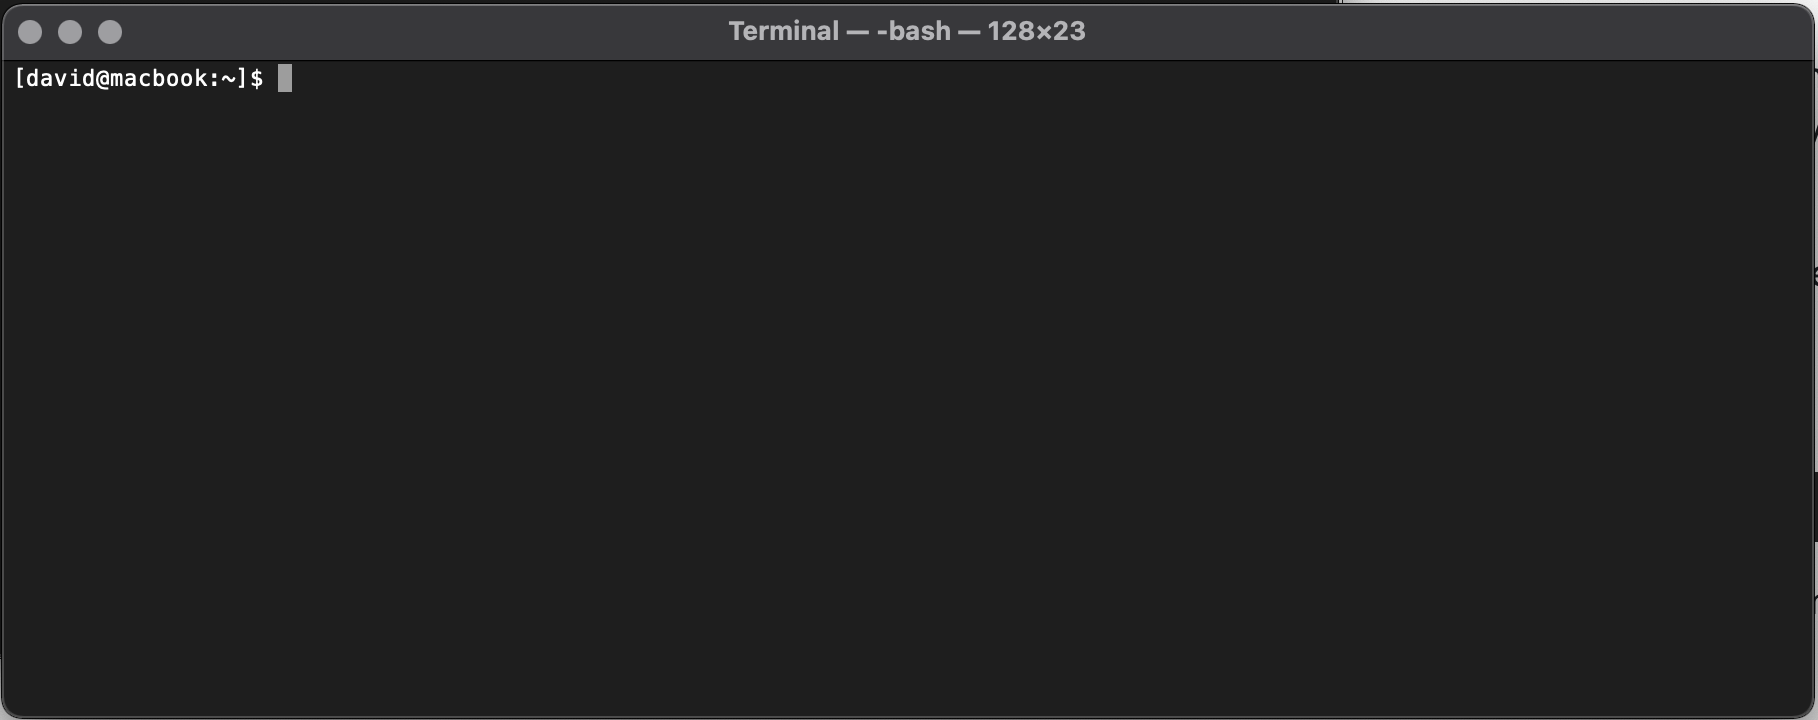
Start by opening the command line. On macOS, press CMD+SPACE to open Spotlight
Search and type terminal. The command line application for macOS is called Terminal.app.
On Windows, click Windows Search or press WindowsKey+R (to run), and type command.
The command line program for Windows is called Command.exe.
When the command line application starts, it will open as a rectangular window, usually with a black background and white or gray text. You will see small bit of text followed by a blinking or highlighted cursor.
Something like
You should note that when you see a block of code in this article like below, it is meant to represent the commands you would run on the command line.
$
The word shell commonly refers to this command line terminal program. This article uses the word shell where appropriate.
The shell is waiting for you to enter a statement or command that it can read and process. You use the keyboard to type the letters and press the enter or return key to signal to the shell that you have completed entering your desired command. The shell then reads your command, evaluates/executes the command to perform whatever operation you instructed it to do, prints the results of that operation (if any) and then loops back waiting for you to enter more input commands. This Read-Evaluate-Print-Loop has an acronym of REPL which you will see throughout your programming career.
As an example, enter the date command to get the current date/time.
For macOS, enter
$ date
For Windows, enter
$ date /t
The /t is called an argument or flag. You are passing the /t argument into the date program which modifies the program's behavior. In particular, the /t tells the date to simply print the current date time. If you do not pass in the /t flag, then the date program will display the current date time and then prompt you to enter a new date (which we don't want to do here).
Once you hit enter, you should see out similar to
$ date
Sat Nov  7 05:37:21 CST 2020
on macOS. On Windows, you'll see
$ date /t
Sat 11/0/2020
Running commands, like you just did above is a common thing for programmers. Run the command..., execute the program..., run ..., use the cli to... are phrases you will encounter when searching the web for inspiration on how to solve your programming problem. You may choose to use a graphical user interface (GUI) like an integrated development environment (IDE) where you are clicking menu options, instead of running commands. But know that there is a command running somewhere behind the scenes when you do so.
Basic .NET Core Commands
Here are basic .NET core commands you will use throughout the rest of this article.
First, check to make sure you have the .NET Core SDK tools by running the following dotnet --version command, to get the following
$ dotnet --version
5.0.101
If you do not see output similar to the above, then you must either install the .NET Core SDK tools (see the Compilation section above), or (if the tools are installed but the command is not found) you need to add the tools to your PATH environment variable. See the Windows or macOS documentation for help.
Create a Working Directory
As you program more complex software applications, you will see you end up with numerous files. Because of this, you will want to create a dedicated directory to store all your files. This special directory is referred to as a working directory because it is the directory in which you do work (i.e. programming/coding).
Run the mkdir command to create a working directory passing in the desired name of the new directory as an argument; in this example, mywork is passed to create a directory named mywork.
$ mkdir mywork
You can now use the cd command to change directory into your new directory, again passing the name of the directory as an argument so the cd command knows which directory you want to change into.
$ cd mywork
If you are unfamiliar with navigating directories on the command line, using the cd command to change directories is analogous to using a file explorer with a mouse to click through different folders. Just like when you use Finder on macOS or Windows Explorer on Windows.
To check your current working directory, use the pwd command which gives you the file path to your current working directory.
$ pwd
/Users/david/mywork
List Your Files
Next, you can run the ls command (on macOS) or dir command (on Windows) to list the files and directories in your current directory.
$ ls
Right now, you do not have any files in this directory. We will use the ls listing command later.
Using a Text Editor
To program, you will create and edit files that contain your source code statements. You will need to use a text editor to do so. Pick a text editor of your choice. Choosing and installing one is beyond the scope of this article. Choices include but are not limited to vi, emacs, atom, sublime, VS Code, notepad++, etc.
If you're not sure which one, go ahead and install VS Code.
This is the editor I use.
Your First Program: Hello World!
Let's write your first program. When learning a new programming language, you will often see "Hello World" is the first program you write. The idea is to use the new programming language to create a simple program that does something interesting like displaying text in the terminal window.
The latest version of .NET Core provides a command line tool you can use to write your first program. Start by opening a shell and running the following command.
$ dotnet new console -o helloworld
Your output will be similar to the following.
The template "Console Application" was created successfully.

Processing post-creation actions...
Running 'dotnet restore' on helloworld/helloworld.csproj...
  Determining projects to restore...
  Restored /Users/david/helloworld/helloworld.csproj (in 127 ms).

Restore succeeded.
Let's break down this dotnet new console -o helloworld command. It is a single .NET Core SDK program named dotnet, followed by four arguments: new, console, -o, and helloworld.
First and foremost, you are running dotnet, a command line tool from the .NET Core Software Development Kit (SDK). This program is the primary program for developing with .NET Core from the command line.
The first argument passed in is new which is an SDK sub-command for the dotnet program. The new SDK sub-command tells the dotnet program that you want to create a new .NET project or file. There are many other SDK commands that you can pass in; for more information run dotnet --help.
Next, you pass the console command option, which is a specific option for the new SDK command of dotnet. This tells dotnet new that you want to create a new project using the Console Application project template. A project template in .NET is a predetermined set of files that dotnet can create for you as a starting point for a development project. The Console Application project template is the specific style of software application that runs on the command line as opposed to being a web application or graphical user interface (GUI). You're already familiar with commands; for example, the dotnet program itself is a console application. There are multiple project templates you can use. For more information, you can run dotnet new --help.
You next pass the -o argument to the dotnet new SDK command which tells the command the file system location of where you want the output to be written. This is important because running the above command will automatically generate code files for you, and the command needs to know where to put them. In particular, the argument immediately following the -o option is the location where you want these files written. You should note that -o is an abbreviation for --output. You can run dotnet new console --output helloworld and get the same result.
As the last argument, you pass helloworld which the name of the directory in which you want the console application files to be written. This value can be any valid directory name you want; I chose helloworld because that sufficiently describes the purpose of the application. In general, this will serve as the name of your application.
Go ahead and run the directory listing command, ls, to see that a new directory named helloworld is created.
$ ls
...
helloworld
...
Next, you can use the change directory command cd to change into the helloworld directory.
$ cd helloworld
Now, when you run a directory listing, you'll get something similar to the following output.
$ ls
Program.cs		helloworld.csproj	obj
Before I explain these files, let's run the program and see what the output is.
You can run your new program by executing the following command.
$ dotnet run
The above command yields the following output.
Hello World!
Congratulations! You just created and ran your first program.
Hello World! Deep Dive
You ran your first program! But how does it work? Let's take a look.
First, run the pwd command to confirm you're in your helloworld directory. If not, change into this directory before proceeding.
$ pwd
/users/david/helloworld
Next, run the ls command to see all the files related to your new program.
$ ls
Program.cs		bin			helloworld.csproj	obj
What is all this stuff, you ask? These are the files and folders that make your program run. There are two files, Program.cs and helloworld.csproj, and two directories, bin and obj. The Program.cs file contains your source code statements, and helloworld.csproj is a C# project file which contains the build statements for .NET to compile your source code into a program. The bin and obj directories contain the binary files produced from .NET compilation.
Open the Program.cs in your favorite text editor. Its contents will look similar to the following code.
using System;

namespace helloworld
{
    class Program
    {
        static void Main(string[] args)
        {
            Console.WriteLine("Hello World!");
        }
    }
}
This file contains code statements written in the C# (pronounced "see sharp") programming language. Programs that are written in C# run on the .NET platform.
The first line of the program is called a using statement which tells the .NET platform that you want your application to include and possibly use the code statements from a code library named System (sort of, more on this later).
using System;
A code library is code written by someone else (usually) and shared with you via a shared library file. A shared library file on Windows has an extension of .dll, and on macOS it has an extension of .dylib. You often have access to documentation on what the shared library is and does and how you use it. In your helloworld program, the System using statement refers to a shared library that is part of what's called the Base Class Library that comes bundled with the .NET platform. In particular, this library provides functionality for the Console.WriteLine(...) used later in the program. You can read more about the functionality in System using the link below.
https://docs.microsoft.com/en-us/dotnet/api/system?view=net-5.0
The next part of your program is a namespace and reads
namespace helloworld
{
  ...
A namespace is block of code statements with a specific name. A code block is a set of statements between an opening curly brace { and a closing curly brace }. For example, you have a namespace code block in your program written as follows.
namespace helloworld
{
  ...
}
This block of code is a namespace with a name of helloworld.
With your knowledge of namespaces, take another look at the using statement using System;. A more precise explanation is System refers to the Namespace in a shared library file you want to include because there are pieces of code you plan to use and do not wish to write out the entire namespace for that piece of code. You can think of a using statements as a way to save yourself some typing.
For example, remove the using System from the program, so you have the following.
namespace helloworld
{
    class Program
    {
        static void Main(string[] args)
        {
            Console.WriteLine("Hello World!");
        }
    }
}
Save this file and return to the command line to run it. Run the following command.
$ dotnet run
You should see output similar to
Program.cs(7,13): error CS0103: The name 'Console' does not exist in the current context [/Users/david/helloworld/helloworld.csproj]

The build failed. Fix the build errors and run again.
Note that your program failed to run because it failed to compile, or build. Side note, the term 'compiling' and 'building' are used interchangeably, which is why you see the phrase ...The build failed....
This means there is a problem with your code and you need to fix it. You can start by reading the message, it starts with the following.
Program.cs(7,13)
This message is telling you to look at the Program.cs file, location (7,13) which is represents the (line, column) in the file. Open your Program.cs file and go to line 7, column 13. It should be the first letter C of the word Console.
The next part of the error message is the following.
error CS0103: The name 'Console' does not exist in the current context...
This message has two parts, the C# compiler error number error CS0103 and the detailed message The name 'Console'... which is important for you to read and understand. You can read more about the compiler error numbers here: https://docs.microsoft.com/en-us/dotnet/csharp/language-reference/compiler-messages/
But in practice, it will be sufficient to read the detailed error message.
What this error means is that your program has a code statement that the C# compiler does not understand, specifically statement Console. This is because you removed the using statement using System; from your code. The statement Console is part of the System namespace in the shared library you learned about earlier.
Go ahead and rewrite Console as System.Console, so your program reads as follows.
namespace helloworld
{
    class Program
    {
        static void Main(string[] args)
        {
            System.Console.WriteLine("Hello World!");
        }
    }
}
Save the file and return to the command line to run the following command.
$ dotnet run
You should now see the output
Hello World!
This worked because you told the C# compiler that you want to use the Console statement found in the System namespace. And the System namespace is, by default, available to you to use out of the box with .NET.
But what is Console? Console is a class, also called a type in .NET. A type (or class) is a block of code statements that you can use in your program. You will hear a lot about objects and object oriented programming in your career. A class or type is a code block set of statements which define a specific kind of object.
You already have a type/class in your application. It is the Program code block identified as follows.
class Program
{
  ...
}
This code defines a type called Program. Similarly, in the System namespace, there is a type/class called Console which defines functionality used in your application.
Types/classes are useful because they allow you to define code statements you can use in other programs.
Within a type/class code block, you can define another type of code block called a method. In your application, you have a single method called Main, which is defined as follows.
static void Main(string[] args)
{
  ...
}
Methods are important because they are where the execution of your program logic takes place. It is within a method code block that you write the code statements that "do something".
In your example program, you execute a code statement that prints something to the screen.
System.Console.WriteLine("Hello World!");
And take notice, that this line of code is exactly calling the WriteLine method code block inside the Console type code block inside the System namespace code block. You can image that somewhere there is code that exists in the .NET base class library that reads as follows.
namespace System
{
  public class Console
  {
    public static WriteLine(string message)
    {
      ...
    }
  }
}
Somebody else wrote this code, but it is available for you to use in your own program. The details inside that WriteLine method take care of the complexity to print the value of the message parameter to the screen. You can use this functionality by writing the following code statement.
System.Console.WriteLine(...)
If you look at your program, you'll notice the same basic structure of a method inside a type inside a namespace.
namespace helloworld
{
    class Program
    {
        static void Main(string[] args)
        {
            ...
        }
    }
}
You've defined a method called Main inside a type called Program inside a namespace called helloworld (or something similar if you used a different name with the project template). You or somebody else can use your code by writing the following code statement.
helloworld.Program.Main(...)
Hello World! Recap
You learned a wide array of concepts in the last section. Let's review them here quickly because they're important concepts in C# moving forward.
First, you learned that a code block is a series of code statements inside curly braces.
{
  System.Console.WriteLine("Hello World!");
}
You then learned that a method is a named code block where the execution of a program actually occurs.
static void Main(string[] args)
{
  System.Console.WriteLine("Hello World!");
}
You also learned that a type or class is a named code block that allows you to define methods (there is a lot more to say about types and classes, but this definition is sufficient for now).
class Program
{
  ...
}
Then you learned namespace's are named code blocks which contain types.
namespace helloworld
{
  ...
}
You also learned about using statements which allow you to include namespaces from other people's shared libraries so you can more succinctly use the types and methods from that library.
using System;
Finally, when you put all these concepts together, you get a final program that you can compile and run.
using System;
namespace helloworld
{
    class Program
    {
        static void Main(string[] args)
        {
            Console.WriteLine("Hello World!");
        }
    }
}
Now what?
This article is a brief introduction to programming using C# and the command line. Hopefully, your interest has been piqued to continue learning more about programming. The more programming you do, the better you'll get. So practice making small code changes to the above example.